By His Hands We Are All Fed Resin Art
The creative people out there may have seen acrylic paint pouring take off this year and become extremely pop world wide. Along side this nosotros have noticed that resin fine art has been on the ascent too. And we tin can meet why!
If you lot accept been thinking virtually getting into resin art but weren't quite sure where to start, then this post is for yous! We volition suspension everything down for you lot and offer some top tips and tricks to make your art the all-time information technology can be.
- What is resin?
- How do you apply resin?
- What exercise you demand to create resin art?
- How to create your outset resin painting
- How to clean up
What is resin?
Resin (or epoxy resin) is a ii office arrangement that consists of a resin and a hardener. Mixing these ii components together creates a chemical reaction causing the liquid resin to become difficult to form a solid plastic type fabric. When used alone you volition be left with a highly sleeky clear finish.
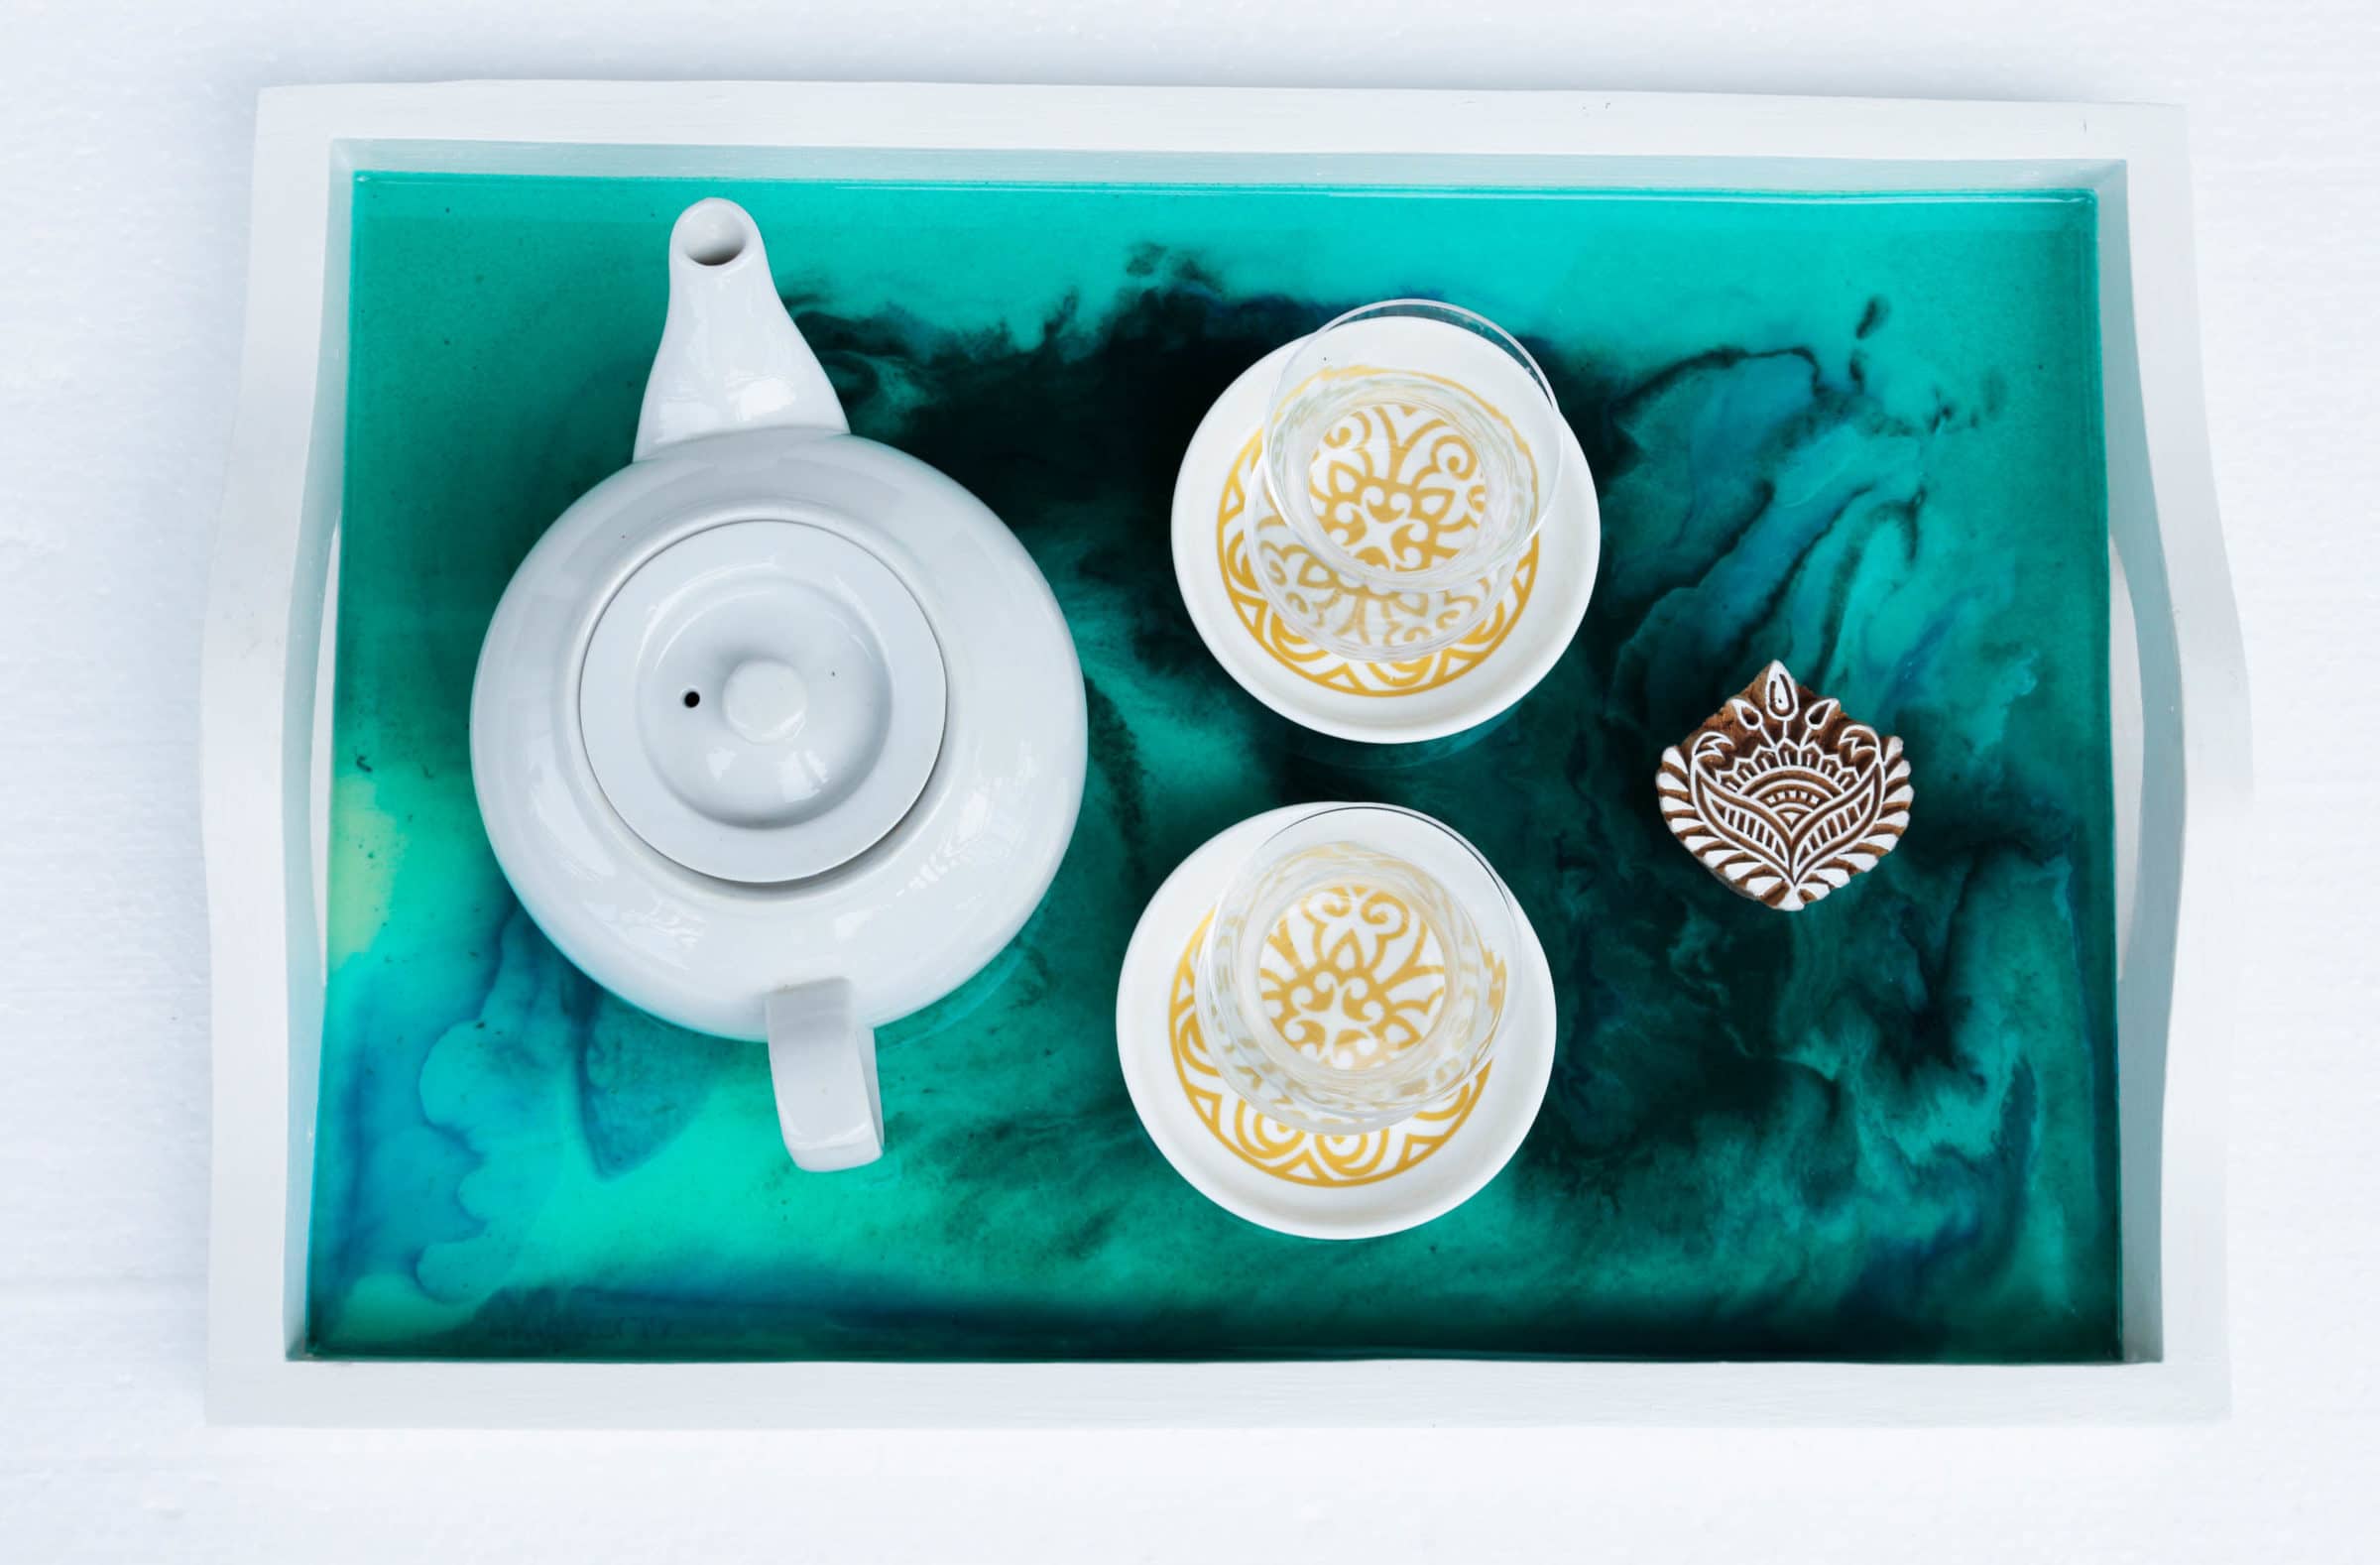
Resin is a highly versatile product that can exist used for a multifariousness of things such as drive means, flooring, in the wood work industry, in the marine industry and more than! More commonly on the fine art scene resin is used to create jewellery, coasters, wall art, table tops, bowls, sculptures and more!


How do yous use resin?
Resin is a medium that you will love to piece of work with if you bask experimenting. It is then versatile you volition be wanting to attempt and use information technology on everything!
As previously mentioned, the nuts of using resin is that you mix the ii components together to create your medium. How y'all and so choose to use information technology is up to y'all. Yous tin can utilise it to embellish previously made fine art, add together it into crevices on tables to create the look of a river, create coasters that look like geodes or look for information technology to start to cure and mould it into a bowl.
The possibilities are countless which is why resin art has become and then pop!
What do y'all need to create resin flow art?
Whilst there are many ways in which you can utilize resin, today nosotros will be focusing on how to create resin flow art. To create your own yous volition need the post-obit:
- Resin
- Liquid Pigments
- Powdered pigments
- Kitchen Curl
- Isopropyl alcohol (70%+)
- Mixing cups and stirring sticks
- Heat gun
- Torch
- Stands or blocks to prop your fine art upwardly with
- Level
- Nitrile gloves
- Respirator mask
- Thick plastic sheeting
- Spreading tool
- Box to cover work
- Lath/tray etc.
- Masking/decorators tape
Resin

Start and foremost you will need your resin. At that place are a broad variety of brands out there but i of the near popular is made by Art Resin. They avowal a lot of good qualities such as:
- No yellowing
- Long work time
- Affordable
- Low-odour
- Easy mixing ratio (i:1)
Liquid pigments
There are a wide variety of brands of liquid pigments out in that location. They are non all made from the same ingredients though so be sure y'all know what's in them before opting for the cheapest one. This is very important if you lot are going to use an open flame to remove bubbles as the pigments may react with the fire.
For ease, we will be recommending Resin Tint past Art Resin. These are oil based pigments and and so they will leave your eyebrows where they are supposed to be if you were to employ a torch on your piece!
We recommend adding just a few drops at a fourth dimension and mix your resin thoroughly before deciding if you lot desire to add together any more. Information technology is important to notation how much you are putting into your resin as anything over half-dozen% can throw the resin and hardener ratio off. This can outcome in the resin non drying properly.
Powdered pigments
Mica powder is highly pigmented and used in a wide variety of things such as nail polish and makeup. It is also great for use in resin art and tin can create lovely textures, colour shifts or fifty-fifty sparkles to your work.
As previously mentioned with liquid pigments, it is of import to note how much you are using. Powder can quickly and easily upset the resin ratio, so remember that usually less is more!
Kitchen Roll
Once you take finished creating your work of fine art y'all should employ kitchen roll to remove any excess resin left inside your measuring cups. Information technology is also handy to have on stand past in case of any emergency spills!
Isopropyl booze (lxx%+)
After you lot have sufficiently wiped your measuring cups make clean, you should then use isopropyl booze (minimum lxx%) to remove the last remnants of the resin.
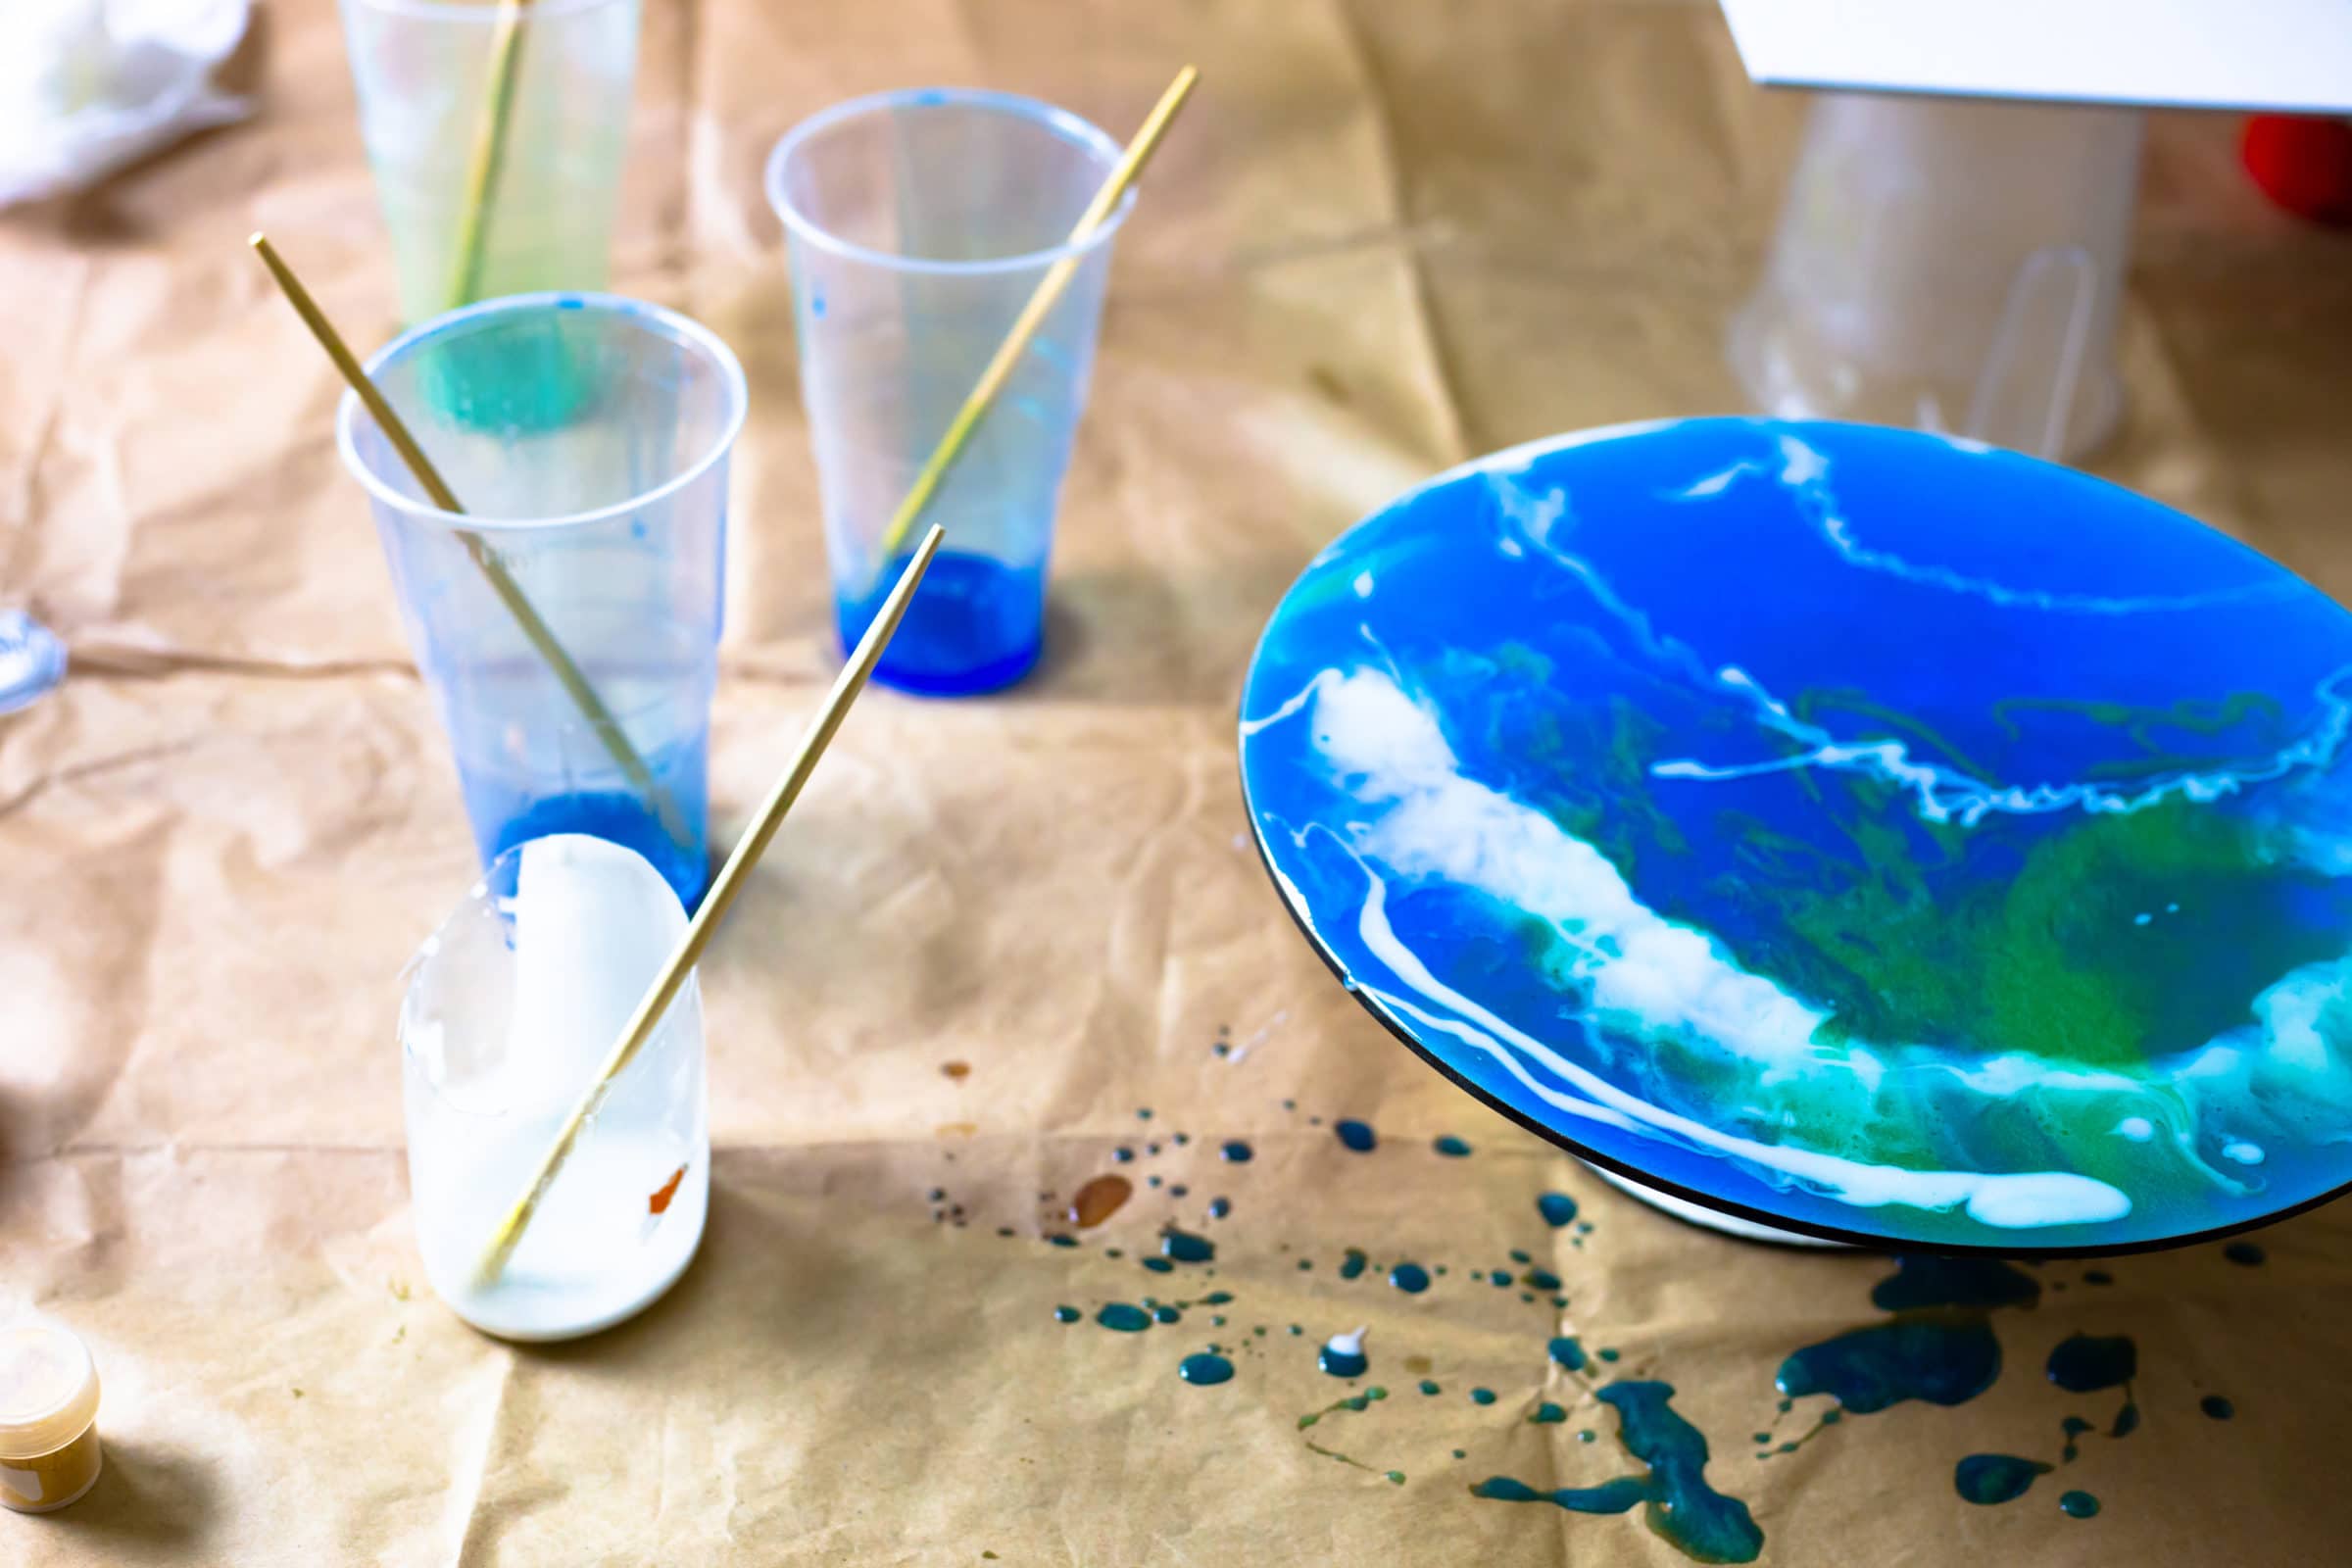
Mixing cups and stirring sticks
Depending on the amount of colours you plan to use will depend on how many mixing cups you will require. Some people prefer to use recyclable disposable cups where others prefer to utilize multi-utilise thick plastic cups that can be wiped downwardly and used again.
Y'all will too need stirring sticks. Once again, the amount you lot will need will depend on the amount of colours to intend to employ for your piece. We recommend using a apartment stirrer (like a lolly pop stick or natural language depressor) as the larger surface area will make stirring quicker and more constructive.
Oestrus gun
A estrus gun is a great manner of moving poured resin around a canvas or board, for instance, to create dissimilar effects such equally lacing.
Torch
A torch is a very important piece of kit to have if you want to have a shine and clear piece with minimal to no bubbles. There are other ways to remove bubbles from your poured resin such as using a tooth option and popping them manually. However, this is very fourth dimension consuming and the end issue will non be equally articulate every bit using a torch no matter how difficult you try!
Others have used an alcohol spray to popular them with varying results. Nosotros would not recommend doing this as calculation any other contaminants to your resin might upset the resin ratio and crusade drying issues.
Stands or blocks to prop your art up with
It is of import to raise your art up off from the table is you lot are going to be pouring onto something completely flat such as a board. This is because the resin will eventually drip off the edges and if your lath is flat to your tabular array, yous will struggle to get it back off in i slice!
Nosotros recommend using stands or blocks or anything else of the same height and forcefulness underneath to continue your work safely propped upwards.
Level
Having a flat surface when creating resin fine art pours is so important! Resin is self-levelling and and then whatever slight tip to one side volition somewhen upshot in all your resin existence tipped off/pushed against the side of your tray etc.
Using a level is vital to creating the perfect piece.
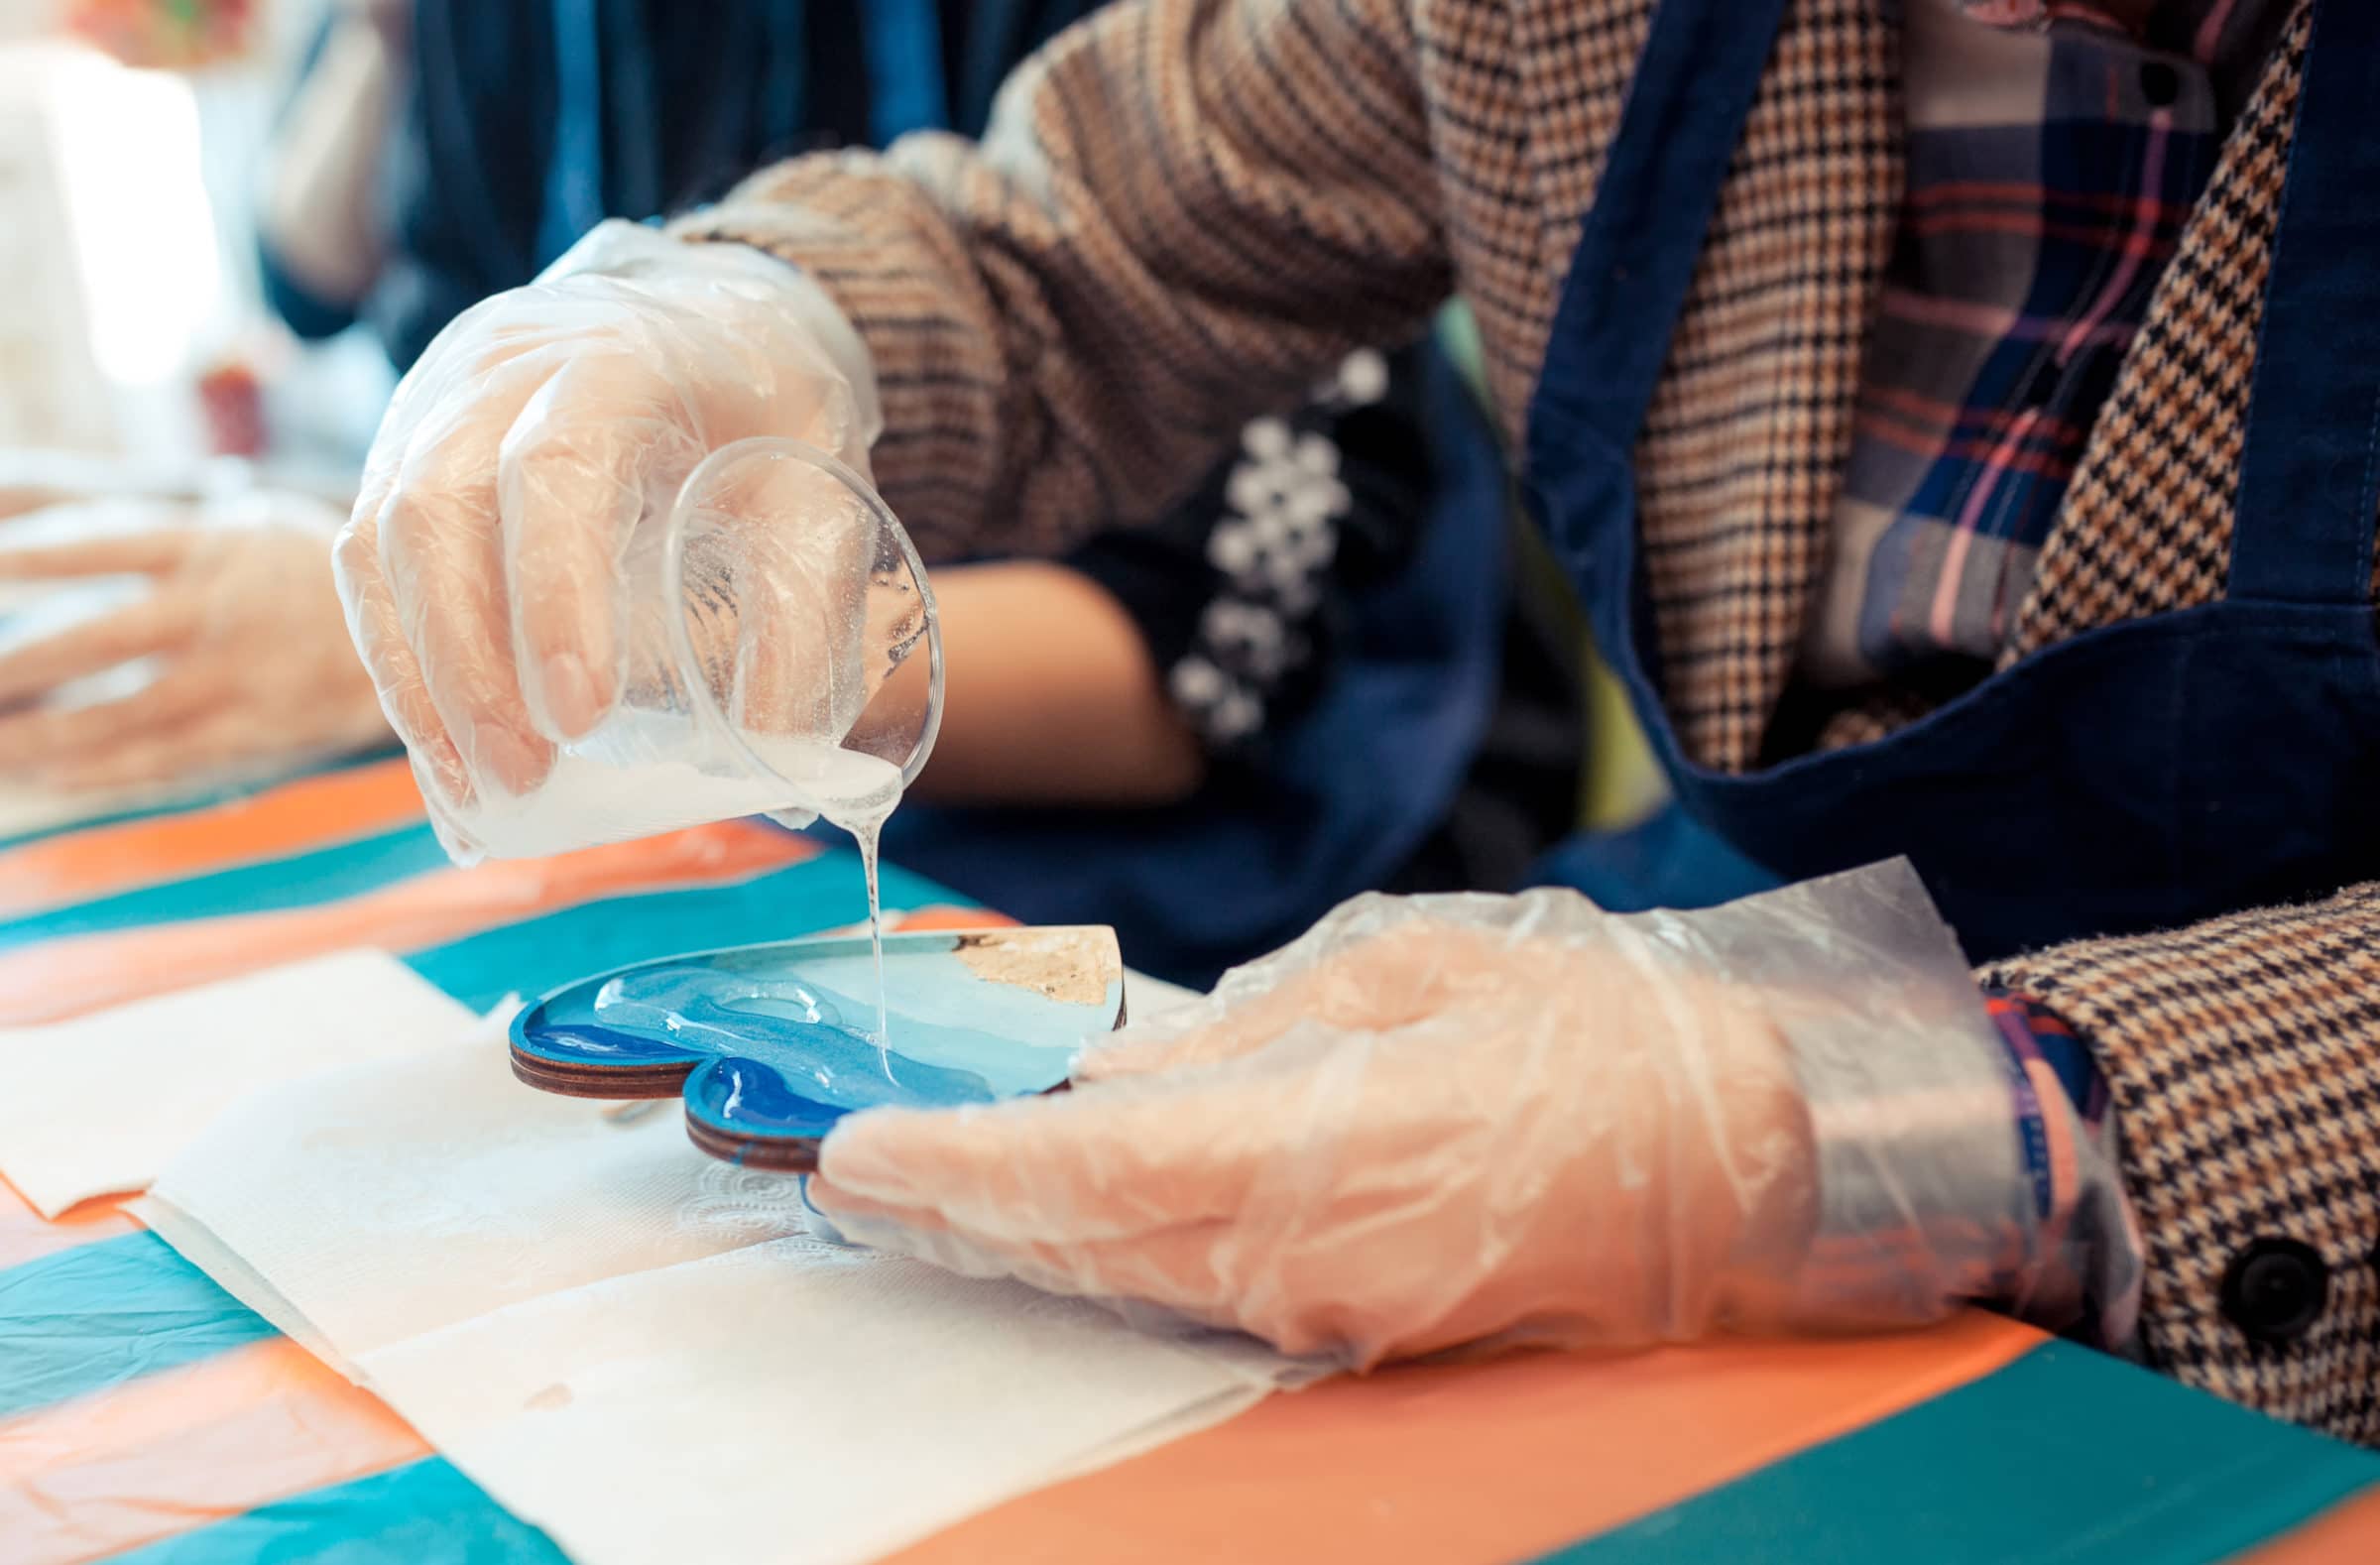
Nitrile gloves
Nitrile gloves are one of the best options when information technology comes to protecting your hands from resin. Non only do they fit snug on your easily, but they are very stiff and offer not bad resistance to oils and other chemicals.
Respirator mask
Resin releases fumes that over fourth dimension have potential to be harmful to your health. If you programme on using resin oftentimes or creating very big pieces that crave large quantities, yous might want to invest in a respirator mask.
Using dust masks such equally are used for decorating by and large won't be helpful for protecting you from fumes. So if you're going to get one, yous might desire to invest in something more substantial – better to be safe than sorry!
Still, using a mask isn't completely necessary if you lot programme on only creating i modest slice.
Thick plastic sheeting
One of the primary things to brand a note of is that resin art is messy! You volition want to make sure to cover your work surface with a thick plastic sheet to catch whatever drips or spillages. That mode one time the resin has dried on the surface, you lot can but peel it off!
Spreading tool
Dissimilar people use different spreading tools depending on the amount of resin they need to movement around and what consequence they are trying to create.
Where possible, we recommend using things such every bit re-usable plastic spatulas. In one case you take moved the resin to where y'all desire it to be, you can merely wipe the plastic down with a piece of kitchen roll and and then spray or wipe down the plastic with isopropyl booze. Then, it's prepare to utilise over again next fourth dimension!
Box to cover work
One time you have finished with your work, you lot need to leave it to fully cure. Different brands will recommend dissimilar lengths of time, only usually most will be dry within 72 hours. During this fourth dimension you will desire to encompass your work to prevent whatsoever dust particles, stray hairs or anything of that nature from landing in your latest piece of art.
Anything big plenty to completely cover it will practice – you can even fashion something yourself out of some plastic sheeting and wooden batons!
Lath/tray etc
Or whatever you wish to create your art work on! Just endeavour to consider what colours you volition be using as this may impact what you lot volition need to do with the thing you are pouring on to.
For instance, if the resin colours you lot are going to exist using are more transparent than opaque then yous volition want to make certain your substrate is in skillful condition equally y'all will probable be able to run across it through the resin. If this is the instance y'all may wish to prep the surface with a sufficient paint starting time, for instance.
Masking/decorators tape
Non a necessity, simply some people similar to use masking/decorators tape to keep certain areas of their board or canvas gratuitous from resin, such as the sides for example.
This depends on your sense of taste and the overall look you are wanting to achieve.
How to create your showtime resin painting
First y'all will want to plan out your design or overall await and feel of your slice. There are a wide variety of pour techniques such as a puddle cascade, a dirty cascade, a flip loving cup cascade and more! Once you accept decided and you have the colours you wish to us in heed, yous are ready to commencement.
- The room should be make clean, grit costless and well ventilated.
- Be sure you are wearing something you don't heed getting messy as accidents can happen!
- Next, you will demand to prepare your work space past laying downward your heavy plastic sheeting onto your tabular array.
- One time your work space is prepped you lot will desire to prepare your substrate. If you programme on pouring onto a canvas, for example, but want to go along the sides free from resin, yous should place your masking/decorators tape on information technology now.
- In one case the substrate is prepared, y'all can place it on top of your stands.
- Utilize your level to make sure that the substrate is dainty and level. If necessary, prop something nether the stand/s to right it.
- Next, put on your gloves.
- Mensurate out the required amounts of resin as per their instructions and mix together.
- Yous volition likely need to mix the resin thoroughly for around three minutes, but be sure to read the manufacturers instructions advisedly and do it for as long as they say.
Now yous accept your resin prepped and your work space set up, it'due south time to get creative!
- Decant the now mixed resin into your smaller mixing cups, 1 for each colour you program to use.
- Colour your resins with a few drops of liquid pigment or utilize a lollypop stick to assemble some powder paint and thoroughly mix information technology into your resin.
- Add more than pigment if necessary, but be cautious of the amount you end upwardly using equally information technology tin upset the resin ratio, causing bug with drying.
- If you would similar to see cells in your art, then now is a good time to add a few drops of silicone to create them. Thoroughly mix the resin once added.
At present everything is mixed y'all are ready to go!
Yous are now ready to pour and create your art. Remember that you tin can help move the resin along past tipping the canvass slightly, or by using an instrument such every bit a plastic spatula or wooden stick.
If you take whatsoever bubbles appear one time you have poured, you can employ your torch to remove them. To exercise this you should very apace and very lightly run the lit torch over the bubbling. Never keep the torch still.
Different resins have different curing times so be sure to go on an eye on the time. Try to create your piece equally chop-chop as possible every bit you will notice that if you are withal moving it once the curing has set in, it will become stringy and wait similar to chewing gum.
Once you are happy y'all should take a close wait to see if in that location are any hairs, dust particles etc in the resin. If in that location is these will need to be removed with something like a toothpick or a prepare of tweezers.
Now you should encompass your art with a paper-thin box (or something like) and leave it to cure. Resin will exist difficult later on 24 hours but tin even so exist damaged hands if improperly handled. Commonly it takes 3 full days for resin to completely cure.

How to clean up
Any residue left inside your measuring and mixing cups can be easily removed. The best way is to tip them upside down onto your thick plastic sheeting that covers your table and let the rest slowly run out of the cups. Get out them for five or and so hours and you lot tin can then simply pull the loving cup up and remove the firm resin from the table.
Any tools that you lot used that came into contact with the resin should be cleaned with isopropyl booze. Merely spray information technology onto the surface and wipe with a canvas of kitchen roll.
If you got any resin on your skin we recommend using vinegar and then soapy water to remove it. You lot tin can also use isopropyl alcohol only we don't really recommend it as it tin apace dry out your pare.
Y'all can also purchase especially made soaps from DIY stores that volition be able to remove it too.
Nosotros hope you found this post helpful. If you have any other tips, tricks or communication, please experience free to exit them in the comments below. We love hearing from y'all!
Want to keep upward with all things Owatrol? Why not follow us on social media? Y'all can find us on Facebook, Twitter, Instagram and Pinterest at@owatroluk or at the hashtag#owatroluk

Source: https://www.owatroldirect.co.uk/how-to-guides/how-to-make-resin-art/
0 Response to "By His Hands We Are All Fed Resin Art"
Post a Comment